Showing posts with label Cost Effective. Show all posts

Wednesday, November 28, 2012

Chicken Stuffed Shells

Every once in a while, you happen upon a recipe that becomes one of your standard go to meals.  You constantly change it or tweak it, reinvent it and improve it, all the while loving it a little more with each incarnation.  For me, that meal is Chicken Stuffed Shells.  I got the original recipe from my sister over a decade ago.  It is a great meal to cook for a larger family, or a pot luck, because it makes a pretty large quantity.  My most recent version is a sneaky way to hide fresh veggies in what would otherwise be a pretty carb heavy meal.
Untitled

Ingredients

Shells and Stuffing
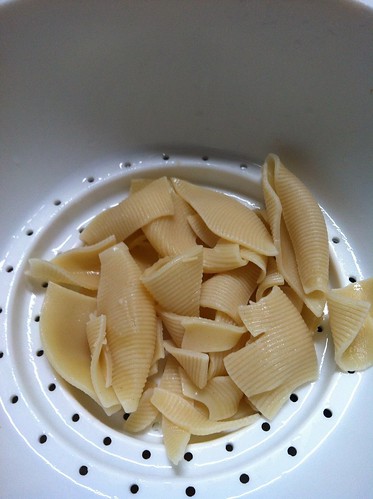
1 box of large pasta shells
1 box of instant chicken flavor stuffing, prepared (or 3 cups homemade stuffing) 
2-3 large cans of chicken (I tend to use more chicken to reduce carbs and increase protein)
4 cups raw fresh baby spinach, chopped 
1/2 cup sour cream or Greek yogurt

Sauce
3 cans cream of chicken soup
1 1/2 cup sour cream or Greek yogurt
1 cup shredded cheddar cheese
milk as needed

Directions

1. Boil entire box of pasta shells according to package directions.  When they are cooked, drain them and separate to insure they do not stick together.  I usually set them out on wax paper.
2. In large mixing bowl, combine stuffing, chicken, chopped spinach, and 1/2 cup sour cream or yogurt.  Mix well to insure all ingredients are well combined.  Set aside.
3.  In medium mixing bowl, combine soup, remaining sour cream, and cheddar cheese.  If the sauce seems too thick, thin with milk until you get it to your desired consistency   You do not want it to be runny, but also not so thick that it cannot be easily poured.  
4.  At this point, begin preheating your oven to 350 F.  Take two 9x13 baking dishes (and possibly another 8x8) and spread a small amount of sauce in the bottom of each dish.  This helps prevent the shells from sticking.
5.  Once the dishes are prepared, use a spoon to begin adding the stuffing mixture to the shells.  Keep in mind that how many shells this recipe yields depends on how full you stuff the shells.  If you made extra full shells, it will yield about 24 shells, if you reduced the stuffing it can yield about 36 (hence the possibility of needing 3 pans).  Place the filled shells into the dishes.  
6.  After all the shells are filled and placed in the baking dishes, cover the shells with the sauce mixture.  You want to make sure all the shells are fully covered, so that they do not dry out while baking.
7.  Cover dishes with foil, and bake at 350 for 35 to 45 minutes or until bubbly.
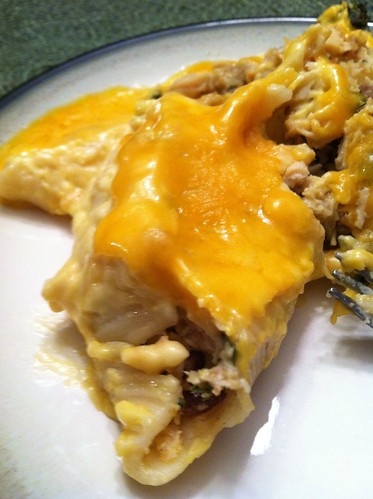
8. Optional: Sprinkle additional cheddar cheese over hot shells and allow it to melt before serving.

There are several alterations you can make to this recipe.  Some people double the stuffing and reduce the chicken.  Sometimes I leave the spinach out.  Sometimes I use all reduced fat dairy products.  You could use wheat stuffing.  You can really  play around with it to suit your needs.  I am sure you could even purchase all gluten free ingredients to make this a gluten free dish.  The point is, customize it in the way that works best for you.  It is a high yield recipe, so it will result in some very tasty leftovers!

Untitled
Cook's Tip: Typically, you run out of stuffing before you run out of shells, or some shells are torn/broken and not usable for this recipe.  Rather than throw them out, cut them into small pieces and freeze for use in a future soup recipe, such as Pasta Fagioli!

Saturday, November 17, 2012

Chickpea Flour

One of the toughest things about living in a small, rural town, is grocery shopping.  Within my town, there are 3 grocery stores, all of which carry a wide variety of chips, sodas, meats, breads, and occasionally some unusual produce (read: fresh Brussels sprouts and parsnips).  However, when trying to cook a meal that calls for an unusual ingredient or spice, I am typically out of luck.   So when trying to cook anything that is gluten free, vegetarian or vegan, well, you can guess how difficult it can be. I live an hour from the closest Whole Foods or Trader Joe's.  When I am near those stores, I will stop in and pick up some things I like, but I lack the storage space to purchase a whole bunch of things I *might* someday use in a recipe.  This has forced me to, well, improvise.

Lately, I have been eyeing up some great recipes that call for chickpea flour, also known as garbanzo or gram flour.  This is a common ingredient in Moroccan and Indian food, which I happen to love.  But it can also be used in the place of other types of flours in other recipes.  Today, during my shopping, I searched for it, and came up empty handed.  Well you know what they say about necessity being the mother of invention?  Totally true.

I decided to grind my own chickpea flour.

Untitled

I got a bag of dehydrated garbanzo beans.  I pulled out my mini food processor, and got to work.

Untitled

I poured about a third of the bag of beans into the food processor, and set it to "grind".  After a couple of minutes, I opened the processor, dumped the contents into a mesh sifter, and sifted out the portion of flour from the larger chunks of chickpeas.  Then those large chunks were returned to the processor.

Untitled

This pattern of "grind, sift, return, repeat" went on for about an hour, with me slowly adding more chickpeas in, until the entire bag was ground.  It resulted in 3.5 cups of flour.  Not too shabby.  It certainly was not a difficult process, just a little messy.  There was a thin layer of flour on my counter top when I was finished, but it was easily cleaned up.
Untitled

All in all, this was a pretty worthwhile project.  Sure I could have just ordered some from the internet, or made a trip to a store further away that carried it, but I am proud of myself for using my resources and items available locally to get what I needed, saving money in the process.

Thursday, November 15, 2012

Refrigerator Oats

Untitled


If you follow me on Twitter, or Facebook (why aren't you?) then you may have seen me blathering a lot lately about refrigerator oats.  I was introduced to this convenient breakfast food by the fabulous Emily Levenson (I get lots of recipe inspiration from her!).  I am a little late to the party but this week I finally tried making them, and folks, my life is changed.

I started out using Emily's chocolate peanut butter oat recipe.  I made a large double batch in a glass bowl with a lid.  The next morning, my husband and I both tried it, and were quite happy with how delicious it turned out.

Untitled

Immediately, I made two more varieties of my own creation, Mexican Hot Chocolate and Chocolate Covered Strawberry.  I used plastic containers with lids.  These were... ok.  I was using Splenda as my sweetener, and I felt like it made them bitter.  Also, the plastic containers did not seem to chill as well, and the oats were a little rubbery.

Untitled
Mexican Hot Chocolate on left, Chocolate Covered Strawberry on right

I went out and got glass jars, and attempted two more flavors, Blueberry and Almond Joy.  These are both winners!  Last night I made Pumpkin, and again, a winner.

Untitled
Blueberry on bottom, Almond Joy on top

By making individual servings, these are super convenient and easy to establish portion control.  You have no reason to skip breakfast.  These leaving me fully satisfied for hours, and typically are under 300 calories (depending on the flavor).  They are cost effective, promote cholesterol reduction, and best of all, fully customizable.  I make several day's worth in advance, so my husband and I can chose from a few different flavors.

The basic recipe I am using is as follows:

Basic Refrigerator Oats
1/2 cup rolled oats
1/2 cup milk (I use almond coconut)
sweetener of choice (I am currently using 1 tsp Sugar in the Raw, other options include Stevia, Agave, Xylitol, Monk Fruit, Honey, really whatever sweetener you like, to whatever degree of sweetness)
3/4 tsp flax seed (you can change amount, eliminate, or also use chia seeds)

Mix ingredients in glass jar, cover, and refrigerate overnight.  You can either eat these cold or let them come up to room temperature.

Already, you can see that the basic recipe has lots of room for customization.  You can use whatever type of milk or sweetener you want, and the flax or chia seeds are quite optional.  Some people add Greek yogurt as well, but I have not tried it.

In terms of the different flavors, the possibilities are endless.  You simply add flavor ingredients right into the jar before mixing.

Almond Joy
1 tsp cocoa powder
1 tbsp coconut
1 tbsp almonds

Blueberry
1/3 cup fresh or frozen blueberries

Pumpkin
1 tbsp pumpkin butter or pumpkin puree
optional additional flavoring of cinnamon or pumpkin pie spice

Other flavors I am considering are peach, maple brown sugar, apple cinnamon, and cranberry.  What flavors do you think I should make?